My Hair Edit: Favorite Products & Hot Tools for Thick, Coarse Hair

Some links in this article are affiliate links. I may earn a commission at no extra cost to you. As an Amazon Associate I earn from qualifying purchases.
Thick, coarse Italian hair comes with plenty of personality. These are the prep products, tools, and finishing touches I reach for to make styling more manageable.
How my hair holds up: My thick, coarse hair holds style very well. I wash it once or twice a week, and the finished style can last me all week between washes. In the mornings, I usually just refresh four or five thin sections across the top rather than restyling my whole head. That staying power is my experience with my hair; it will vary with yours.
Start with the step you need help with. Each item below has a direct shopping link; you don’t need every product or multiple prep products at once.
Prep & protect · Dry & style · Finish & polish · Little essentials
Prep & protect

amika The Wizard
My before-the-comb essential. I always reach for The Wizard before brushing or detangling, a habit I picked up from my stylist. It earns its place because the prep matters just as much to me as the finished style. On Dream Coat days, see the application note below before layering products.

Color Wow Dream Coat
The product I reach for when I want my thick, coarse hair to look sleek and polished. I love combing it evenly through each damp section before drying. It is one of the main products behind my blowout routine, rather than a finishing spray I add at the end.

Kérastase Nectar Thermique
The leave-in blow-dry milk in my kit, and an alternative prep option to consider alongside Dream Coat. Follow its label for application; I don’t need to use every prep product in this edit at once.
A note on prep: Color Wow recommends using Dream Coat without other styling products on damp hair. My habit of reaching for a detangler is personal to me; for a Dream Coat application, follow its directions rather than layering The Wizard or Nectar Thermique underneath. Think of these as options for your routine, not a three-product checklist.
Dry & style
For me, these tools do different jobs: the dryer handles the roots, the blow-dry brush smooths the lengths, and the heated thermal brush adds the final shape once everything is dry.

DREAME Hair Glory Combo Hair Dryer
A good dryer makes such a difference when there is this much hair to get through. I use a regular dryer for the roots before moving to my blow-dry brush. A faster dryer has roughly halved my drying time in my experience; this is the DREAME option linked in my kit.

L’ANGE Le Volume Blow-Dryer Brush, 60 mm
My tool for the smooth foundation. I use a blow-dry brush to work through the lengths with gentle tension, keeping the shape mostly straight with a slight bend at the bottom. The L’ANGE Le Volume linked here is the 60 mm version.

FoxyBae Thermal Brush, 1.5-inch
The finishing-tool category I would keep in my routine for those soft, sweeping ends. My pictured brush in the tutorial has a one-inch barrel; the shopping link here is a different, 1.5-inch FoxyBae alternative. It is not the exact tool I own. A heated thermal brush is used on completely dry hair, unlike a brush that blows air.
Finish & polish
This is where I use the lightest hand. A little oil through the ends, then a little pomade over the surface, is the finish I come back to.

L’ANZA Keratin Healing Oil
My small-but-beautiful finishing touch. I work a very small amount through the lengths and ends once the hair has cooled. I love the texture it gives my hair and how polished the ends look without needing much product.

Paul Mitchell Foaming Pomade
My final skim over the top for flyaways and a little hold. I rub a tiny amount between my palms until the milky texture turns lightly foamy, then barely pass my hands over the surface. This is absolutely a start-with-less product for me.
The little essentials
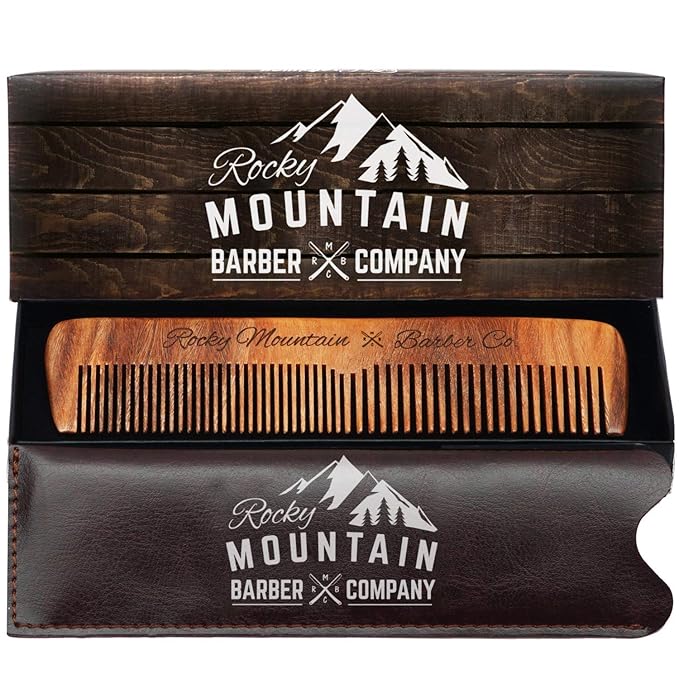
Fine-Tooth Wooden Comb
One of the simplest things in my kit, and one I use constantly. I love a fine-tooth wooden comb for distributing product evenly through a section before drying. I detangle gently first rather than forcing fine teeth through knots.

AIMIKE Sectioning Clips
My favorite easy clips for keeping the top half out of the way while I work underneath. They make sectioning feel manageable, especially with thick hair. I use them for both the drying stage and the final shaping.
See how I use the kit
Want the full order, sectioning details and directions for that soft sweep? My 20-minute old money blowout tutorial for thick, coarse hair walks through the routine with my own progress and finished-hair photos.
Explore The Rosé Edit · More from Rosé Beauty
With a rosé glass half full,
Danielle ♡