My 20-Minute Old Money Blowout for Thick, Coarse Hair

Some links in this article are affiliate links. I may earn a commission at no extra cost to you. As an Amazon Associate I earn from qualifying purchases.
My thick, coarse Italian hair responds best to a simple order: dry the roots, smooth the lengths, then shape the ends. Here is how I get a soft, polished blowout at home.
With this routine, it takes me about 20 minutes to go from damp hair to fully styled. That’s my hands-on styling time; your timing will depend on your length, thickness and how damp your hair is when you start. The finish I’m after is low-key: smooth lengths, a little lift, and soft ends that sweep away from my face.
How my hair holds up: My thick, coarse hair holds style very well. I wash it once or twice a week, and the finished style can last me all week between washes. In the mornings, I usually just refresh four or five thin sections across the top rather than restyling my whole head. That staying power is my experience with my hair; it will vary with yours.
What I use

My kit is simple: a regular hair dryer with a concentrator nozzle for the roots, a blow-dry brush for smoothing, a one-inch heated thermal curling brush for shaping, a comb, and sectioning clips. The blow-dry brush blows air; the thermal brush is a heated styling tool that I use only once my hair is completely dry.
For prep, the products pictured are Color Wow Dream Coat Supernatural Spray and Kérastase Nutritive Nectar Thermique. They have different application instructions, so you don’t need to stack both to follow this technique.

1. Prep and gently detangle
I start with towel-dried, damp hair. Gently squeeze out excess water rather than rubbing the lengths. Before combing or brushing, I always reach for amika The Wizard. My stylist’s advice is to avoid dry-brushing my hair without a light product first, and that’s a habit I’ve kept. I use a light touch and follow the product’s directions, gently detangling from the ends upward while supporting each section.

For a Dream Coat blowout, I work section by section. I spray Color Wow Dream Coat generously and evenly onto a damp section, hold the section taut with gentle tension, and comb it through with my fine-tooth wooden comb. I love using the fine teeth to distribute the product evenly through each section. Then I use the regular hair dryer just on that section’s roots before moving through the lengths with my blow-dry brush. I repeat this sequence as I work through my hair. Shop Color Wow Dream Coat.

Nectar Thermique is the other prep product in my kit: a leave-in blow-dry milk designed for medium-to-thick, dry hair. Use it according to its label as an alternative prep option. Shop Kérastase Nectar Thermique.
A note on prep: Color Wow recommends applying Dream Coat without other styling products on damp hair. My habit of using a light detangling product is personal to my routine; for a Dream Coat application, follow its directions rather than layering The Wizard or Nectar Thermique underneath.
2. Blow-dry the roots first

After spraying and combing each section, I keep it gently taut and use my regular dryer to dry the root area. I keep the nozzle off my scalp and the airflow directed down the hair. This roots-first step happens before I take the blow-dry brush through that section.
The goal is to remove wetness at the roots while leaving the lengths ready for smoothing. If the lengths are still very wet, I remove more moisture first, following my blow-dry brush’s instructions.
A fast hair dryer makes such a difference with thick hair. In my experience, a high-speed dryer cuts my drying time roughly in half compared with my previous routine. I’ve linked the DREAME Hair Glory Combo in the shopping edit below.
3. Smooth with the blow-dry brush

Working in manageable sections, I take the blow-dry brush through the hair, keeping each section straight and taut with gentle tension. I glide steadily through the lengths, then give just the bottoms a small turn. I’m building a smooth foundation here; the outward shaping comes afterward with the thermal brush.
Keep the pass mostly straight and turn the bottoms only a little. Finish drying each section completely, including the underneath layers, before moving to the thermal brush. The comparison photos below show the blow-dry stage before any thermal-brush shaping.
The blow-dry stage, before the thermal brush
These first three views show my hair partway through blow-drying, with one side smoothed and the other still showing its natural texture. I haven’t used the thermal brush yet.


With the blow-dry step complete, the hair is ready for the finishing shape.
4. Use the one-inch thermal brush for a soft bend
Once the hair is completely dry, I section the top half out of the way with my favorite easy sectioning clips so I can shape the bottom layers first. Then I release the top and repeat. This is when I use my one-inch thermal brush to curl the bottoms outward. I use the lowest effective setting for my hair and tool, keep the hot barrel clear of my scalp, and work with gentle tension.
Think of roughly 80 percent of the pass as a straight smoothing movement. Only when you reach the last three to four inches do you add a small turn. A quarter-turn is a useful starting point; the goal is a broad, soft bend. Keep the brush moving and release gently rather than winding a long section tightly onto the small barrel.

Shopping note: The thermal-brush links in this tutorial go to the 1.5-inch FoxyBae alternative. My brush pictured here has a one-inch barrel.
Which direction do the ends go?
Around my face, I turn them away from my face. On each side, that means sweeping back toward the ear on that same side. Mirror the movement with your wrist on the other side. Use just a little outward turn through the side sections, and keep the back mostly straight with a subtle end bend.
For the front pieces, lift up and slightly forward first, glide through, then give the ends that small turn away from the face. Release and sweep back while they cool. A little root lift and a soft face-framing sweep create the shape without needing a full curl.
5. Let it cool, then loosen it with your fingers
Once I’ve shaped everything, I let the hair cool before running my fingers through it. If I have extra time, I leave it alone for 10–15 minutes while I finish getting ready; that passive cooling time is separate from my roughly 20 minutes of styling.
When it’s cool, I gently finger-comb to soften the sections and settle the shape. A light touch keeps the movement and lift. If the ends look too curled, I use less rotation next time. If they look puffy, I pay more attention to section size and fully drying the underneath layers during the smoothing step.
6. Finish with a little oil and soft control
Once the shape has cooled and I’ve softened it with my fingers, I work a very small amount of L’ANZA Keratin Healing Oil through the lengths and ends. A little adds such beautiful texture and helps the hair feel finished without weighing down the movement.
Then I finish with Paul Mitchell Foaming Pomade. Start with a tiny amount and rub it thoroughly between your palms until the milky texture becomes a lightly foamy pomade. I barely skim my hands over the top of my hair to lay down flyaways and add a tiny amount of hold. A little goes a long way—you can always add more, but I start with much less than I think I need.
The finished blowout
After the thermal brush: soft face-framing movement and outward bends at the ends. These front, side and back views show the finished shape.


The detail that makes the difference
For my hair, it’s the order: dry the roots, smooth the lengths, then shape the ends. The thermal brush only needs to add that finishing sweep. Once you get comfortable with the small turn away from the face, the whole routine feels much easier.
Shop my blowout kit
The products and tools behind the routine, with my notes on how each fits into the process. The linked FoxyBae is a 1.5-inch alternative to my pictured one-inch thermal brush.

amika The Wizard
My before-the-comb essential. I reach for a light detangling product before combing or brushing, following my stylist’s advice to give dry hair a little slip first. Follow the prep note above on Dream Coat days.

Color Wow Dream Coat
I apply this section by section, hold the hair taut and comb it through with my wooden comb before drying the roots and smoothing the lengths.

Kérastase Nectar Thermique
The blow-dry milk in my kit for medium-to-thick, dry hair. An alternative prep option used according to its label; it isn’t necessary to layer it with Dream Coat.

DREAME Hair Glory Combo Hair Dryer
The high-speed dryer linked for this edit. I use a regular dryer on the roots first; a faster dryer has roughly halved drying time in my experience. Results depend on your hair and starting moisture level.

L’ANGE Le Volume Blow-Dryer Brush, 60 mm
My smoothing step: keep the section straight and taut, glide through the lengths, and give just the bottoms a small turn. Finish drying completely before the thermal brush.

FoxyBae Thermal Brush, 1.5-inch
A larger-barrel shopping alternative to the one-inch thermal brush pictured in my tutorial. It is a different tool and size. Use on dry hair for soft bends, with a small outward turn at the ends.

L’ANZA Keratin Healing Oil
My finishing oil. I use a very small amount through the lengths and ends for beautiful texture and a soft, polished finish.

Paul Mitchell Foaming Pomade
My final touch for flyaways and a little hold. Rub a tiny amount between your palms until the milky texture feels lightly foamy, then skim over the surface. A little goes a long way.
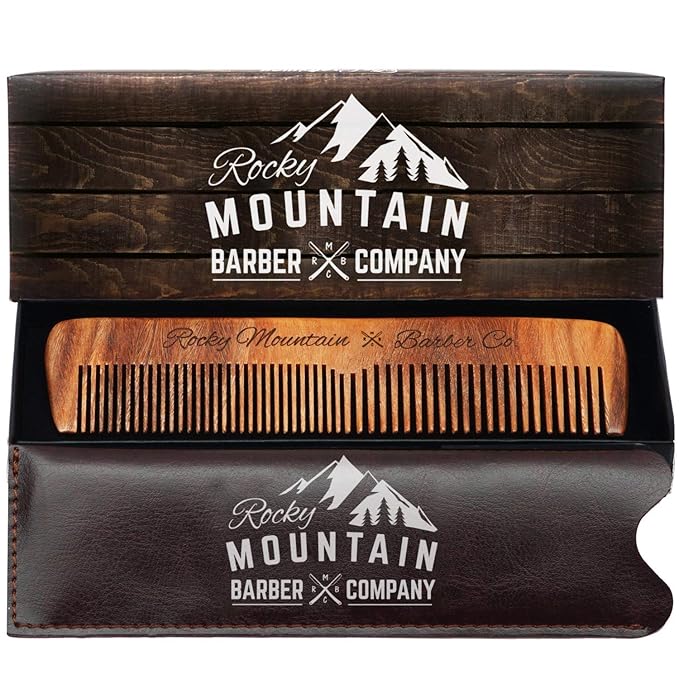
Fine-Tooth Wooden Comb
I love using the fine teeth of this wooden comb to distribute product evenly. After applying Dream Coat to a section, I hold the hair taut with gentle tension and comb it through before drying the roots.

AIMIKE Sectioning Clips
My favorite easy clips for sectioning. I use them to keep the top half out of the way while I work through the lower layers, then release the top and repeat.
With a rosé glass half full,
Danielle ♡